Update December 2023: It looks like imapsync now have no limits for their online based GUI tool, which you can use here: https://imapsync.lamiral.info/X/. It’s free to use, however you can also throw a few dollars their way to support the tool. There’s another site called ‘Nerdie Dad’ as well that has an online GUI tool based on imapsync which is free with no limits too, the interface is a bit nicer, and their server looks to have more dedicated RAM and CPU cores. You can try that one here: https://nerdiedad.com/tools/imapsync/. Read more about my experience with these GUI tools down below.
The why
I had the silly idea to stop using my personal Gmail email address, the one that I’ve had since they first launched. The reason? I feel mildly uncomfortable that Google knows more about me than I do just by reading my emails. And so I decided to do what I did to my social media accounts a while back – nuke it.
I still remember when Gmail first launched and you could watch the capacity of your mailbox increase as Google kept adding servers and storage to their fancy new free data-mining email service they were so graciously gifting to the world. The internet was still young, the horizon looked optimistic, and I wanted to get rid of my [email protected] email address that I created in primary school. So I registered my shiny new [email protected] email address. It felt good. But now it feels dirty.
I managed to grab stew.au some months back when the .au TLD was launched (pretty stoked about it actually), and it seemed like a fitting replacement to use for my personal email. I decided to go with [email protected]. But my boss (and wife) said that was ‘cringe’. So now it’s [email protected]. Seems redundant. I don’t like it. But I do as I’m told like a good little boy.
I use MXRoute for all of my custom domain email addresses – it’s great. About 4-5 years ago I managed to score a 100GB account that renews every 3 years for $30 (pretty stoked about that, too). There certainly aren’t any frills, but it’s been rock-solid for the last 4 years, and so it seems like the perfect home for my 22GB (262,514) personal emails. Yeah, I don’t like to delete things.
The thought of migrating 262,000 emails between accounts using something like Thunderbird or Outlook made my stomach turn, so I decided to look into Imapsync. I first heard about it a few years back, and whenever someone in the design/development industry mentions it, everyone gushes.
It is open-source software, so you can download it from Github and run it straight on your computer or server. There is also a cloud version which allows you to move mailboxes that are 3GB or less for free, with a reasonable paid option for large mailboxes. It basically does what it says in the name, it syncs using IMAP, and it does it very well.
The website is awful. A real hot mess. But it’s also charming in its own way. That being said, trying to find information on it is…not a pleasant experience. The software also has no GUI, it is all run via command line, which made finding information on getting it running even more painful (I like pretty UI’s). Because of all that, I thought I would document my experience in case anyone finds it helpful, or even mildly entertaining.
The platform
There are a few ways you can go about using Imapsync. You can run it on your computer, a server, or using their paid cloud service. And they have instructions on how to do each of them on their website.
My initial plan was to run it from Windows. They have ‘easy instructions’ which involve using a batch file that, for the life of me, I just couldn’t find. I’m guessing it’s only available in the paid version of the software. Either that or I just couldn’t find it because of the really bad terrible website that makes it so hard to do or find anything. I’m not complaining though, it’s made by one guy, it’s open-source, and once you get it working, it works great.
Then there’s a ‘hard way’. This involves installing something like Strawberry to run Perl, and then installing the many Perl modules that Imapsync relies on. I got to the point of installing a few of the modules and got bored of it.
I decided that Linux would be easier and funner – all I had to do was spin up a VPS at Vultr, run a few commands, and we’re off to the races. So that’s what I did. I even started syncing my mailboxes before the word ‘security’ suddenly entered my brain. Being a responsible individual, I should at the very least set up some basic security… but then I had a better idea.
What if I just ran Ubuntu on my Windows machine? It’s the best of both worlds. After a quick search I found that Ubunutu has a one-click install in the Microsoft Store. Pfft, easy. And I’ll even save about 80 cents not having to run a VPS for a few days. I might even take that 80 cents and treat myself to a Macca’s soft-serve afterwards…if I had no self-respect that is.
The installation
Installing Ubuntu on Windows
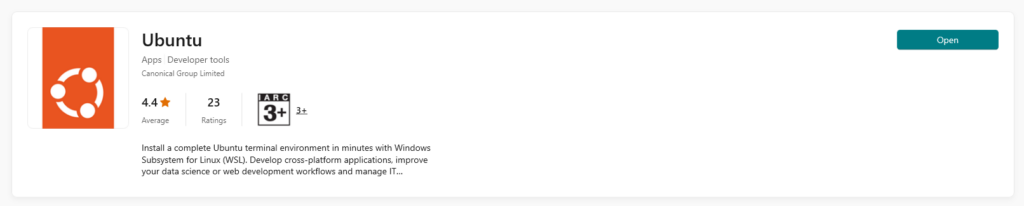
If you’re on Windows, you can just open the Windows store, search ‘Ubuntu’, and download it as an app. There were a few services I already had activated so I didn’t need to do anything other than that, however I found this YouTube video which goes into additional steps you may need to take when installing Ubuntu on Windows. If there are any errors when opening the Ubuntu app, basically just follow the link and do what it says.
Installing Imapsync on Ubunutu
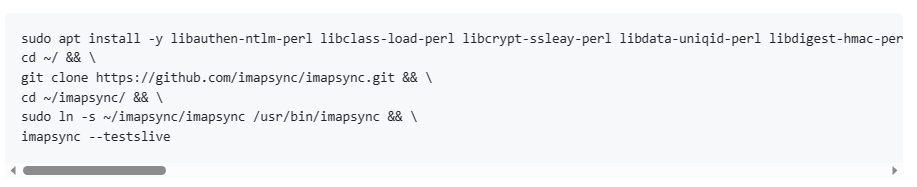
sudo apt install -y libauthen-ntlm-perl libclass-load-perl libcrypt-ssleay-perl libdata-uniqid-perl libdigest-hmac-perl libdist-checkconflicts-perl libencode-imaputf7-perl libfile-copy-recursive-perl libfile-tail-perl libio-compress-perl libio-socket-inet6-perl libio-socket-ssl-perl libio-tee-perl libmail-imapclient-perl libmodule-scandeps-perl libnet-dbus-perl libnet-ssleay-perl libpar-packer-perl libreadonly-perl libregexp-common-perl libsys-meminfo-perl libterm-readkey-perl libtest-fatal-perl libtest-mock-guard-perl libtest-mockobject-perl libtest-pod-perl libtest-requires-perl libtest-simple-perl libunicode-string-perl liburi-perl libtest-nowarnings-perl libtest-deep-perl libtest-warn-perl make cpanminus && \
cd ~/ && \
git clone https://github.com/imapsync/imapsync.git && \
cd ~/imapsync/ && \
sudo ln -s ~/imapsync/imapsync /usr/bin/imapsync && \
imapsync --testslive
After a quick Google I found this fantastic ‘lazy guide’ script which does everything you need to install Imapsync with a simple copy and paste. You had me at ‘lazy’. It has ‘Ubuntu 20.04’ in the title, but it works fine on Ubuntu 22.04. Let’s talk through what it does:
- The first command installs Perl and all of the required modules to your Ubuntu server.
- The second command changes the directory you’re in to the ‘home’ directory.
- The third command clones the Imapsync Github repository to your server in a directory called ‘imapsync’.
- The fourth command changes the directory you’re r in to the new ‘imapsync’ one.
- The fifth command creates a symbolic link to the imapsync installation so you can run the imapsync command wherever you are on your server.
- And finally, the sixth command tests imapsync to make sure it’s configured correctly.
You can take this whole chunk of command, paste it into your terminal and let it do its thing. Or if you’re the type who likes to savour the finer things in life, you can run each command on its own, just remove the two ampersands and backslash for each command. Or if you’re a real madlad, you can install Perl and all of its modules one at a time.
The sync
Now it’s time for the fun part, moving 262,000 emails from one mailbox to another. The ‘lazy guide’ I linked to earlier has some good examples of commands to run. The Imapsync website also has detailed documentation to cover every variable you can add to your commands.
However, I just need a stock standard, quick and dirty, mailbox to mailbox clone with everything staying exactly the same. To do that, here is the command you need to run on ubuntu:
imapsync --host1 imap.gmail.com \
	 --user1 [email protected] \
	 --password1 pAsS0WoRd1 \
	 --ssl1			    \
	 --host2 mail.example.com \
	 --user2 [email protected] \
	 --password2 pAsS0WoRd2 \
	 --ssl2
In this example, ‘host1’ is the old account’s mail server URL, and ‘host2’ is the new account. I would recommend you type it out in notepad and triple check the details before running the command.
If you are migrating a Gmail account like I am, there is an additional step to get the correct password. You can’t just use the password you use for your entire Google account, you need to create an ‘App Password’, which you can do here. Just select ‘Other’ as the app, give it a descriptive name, and click ‘Create’. When you’re finished the sync, you can delete the password as a good security measure.


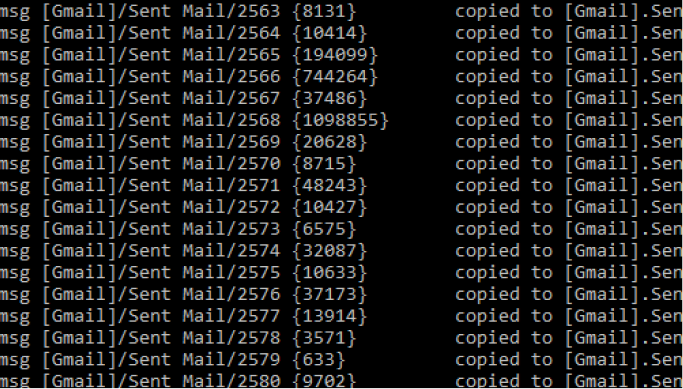
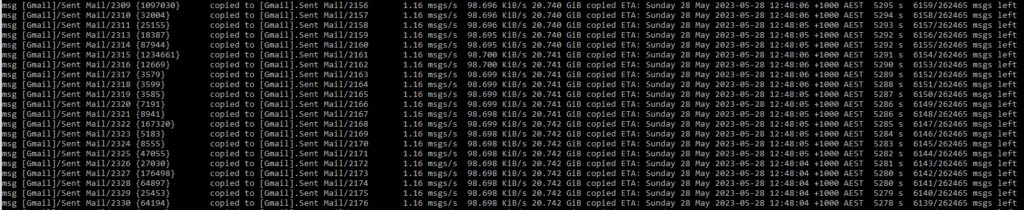
Once you’ve got the command written out, paste it into your Ubuntu command line and watch the magic happen. It will start by scanning the directories, files, and sizes. Then it will begin to copy over the emails, and your command line will look something like this:
The finale
Once the sync is complete it will output some cool statistics about the transfer. Here’s mine:
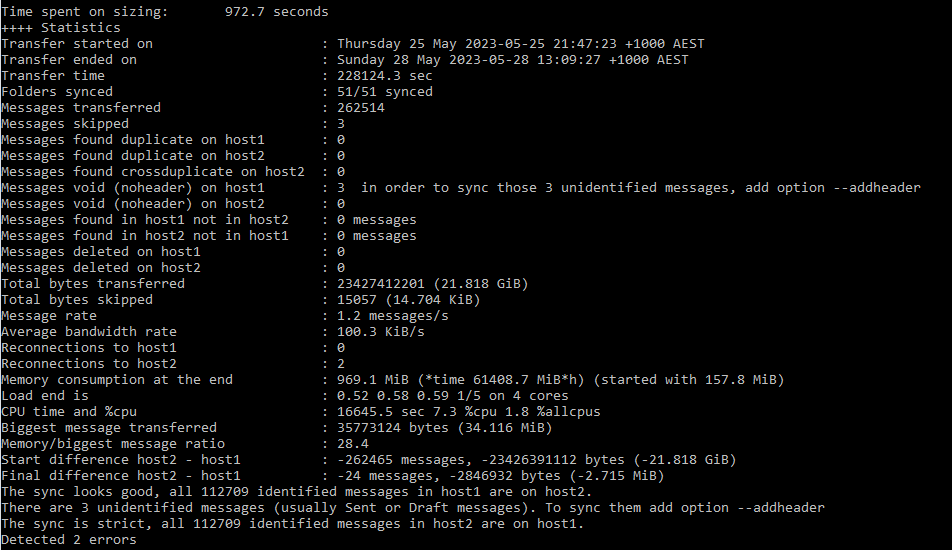
To sync my entire mailbox, it took 228,124.2 seconds (or, if you like… 3,802.07 minutes… 63 hours and 22 minutes… or 2 days, 15 hours, and 2 minutes). And the biggest email it transferred was a touch over 34mb. Pretty cool.
Overall I’m happy. And particularly happy to say goodbye to our supreme overlord Google having a cheeky peek at my conversations and stealing my brilliant ideas.
Some time later
As I mentioned in the update at the top of this article, IMAPSYNC now have no limits on their online tool with a GUI (it used to be limited to 3GB mailboxes). That’s pretty awesome. I tried it out with a few smaller inboxes of around five to ten thousand emails and it worked great. It was a bit slow but it chugged along and got the job done.
I decided to try and move my mammoth 20GB mailbox with it. It looks to be going well, the ETA was about 6 days (quite a bit longer than the 2.5 days it took for my local PC using the CLI), but I figured that was fine, it was a quick, easy and convenient way to do it. Unfortunately, about 2 days in it pooped itself. Keep in mind that this migration is going the opposite direct (TO Gmail not FROM Gmail), so this may just be an issue with the mail server that I’m using not handling it. I’m going try and continue the migration using the CLI again to see if I run in to the same issues, and report back with a quick update on this post again.