
Today we’re going to walk through the steps we need to take to run a find and replace inside a MySQL database using phpMyAdmin and SQL Queries.
When I was working on this website (and all other sites I build), I was using a staging domain. In this case it was ‘stew.au’. When I migrated the website to the final domain (stew.au), my hosting control panel (GridPane) did a decent job of updating the URL’s in the database to the new ones, however it never seems to get all of them.
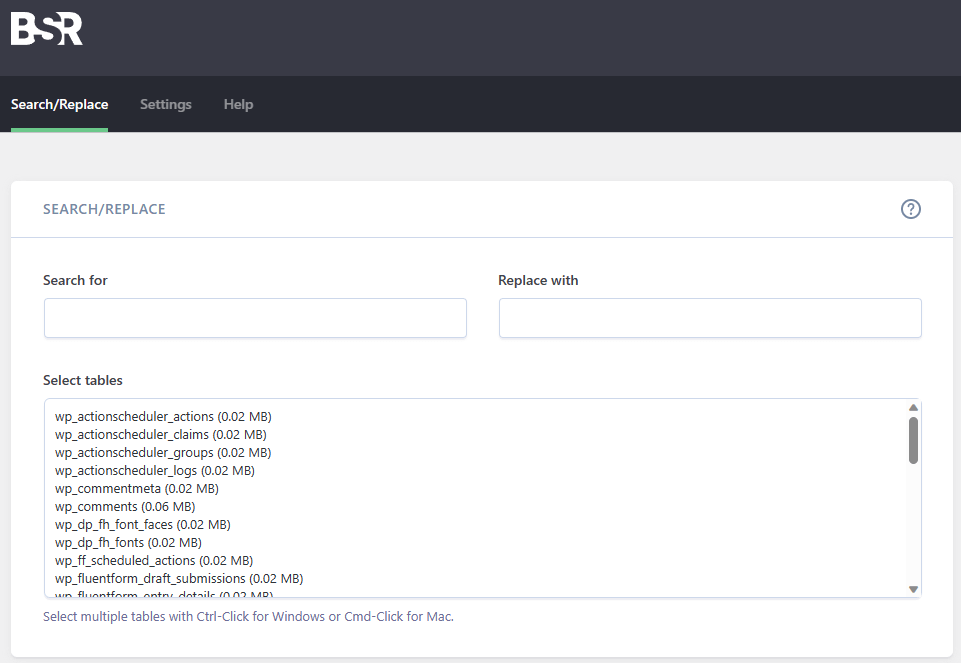
I typically use a plugin like ‘Better Search and Replace’ to search through my entire database and update URL’s. It does an okay job, but just like GridPane it misses some. So to do it correctly I just jump in to phpMyAdmin and run a few SQL queries.
Before you start make sure to backup your database, more than one way if you can. If you make a mistake it can bring the whole site crashing down.
Now it’s time to hop inside phpMyAdmin. The way you do this will vary depending on where your website is hosted, so just look at your host’s documentation. Your host may not use phpMyAdmin, but you should still be able to follow these steps using whatever GUI your host uses for database management, as we are just running an SQL query (SSH works too).
Start by running a search inside your entire database for the URL (or term) you’d like to replace. Make sure the correct database is selected in the left column and then click the ‘Search’ tab. Type in the term you’d like to find, ensure all tables are selected, and click ‘Go’.
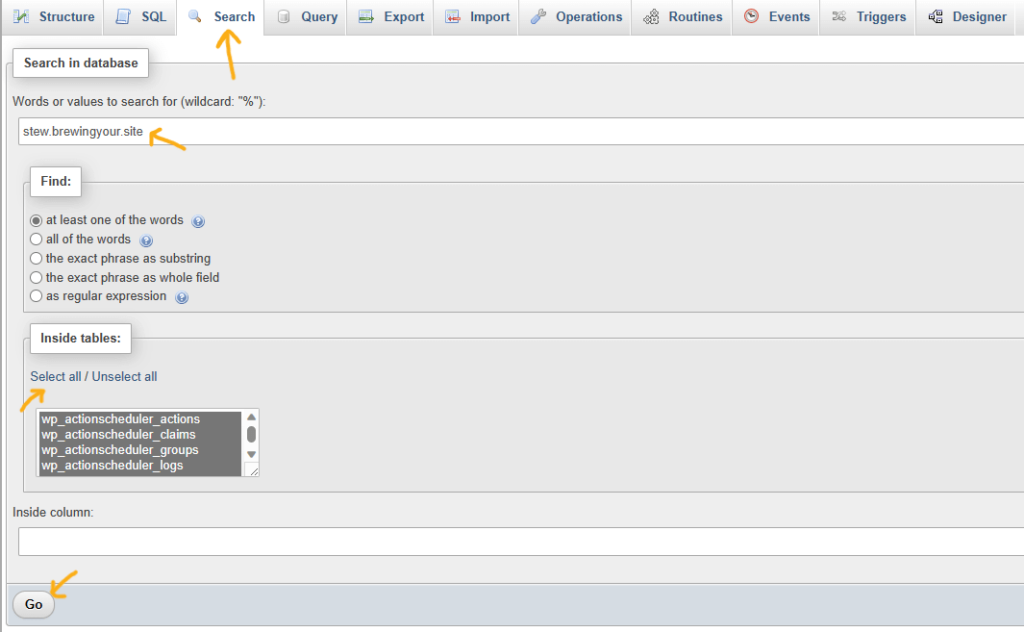
Once it has finished searching it will bring up a list of every table inside your database, and how many matches there are for your term inside each table. As you can see there were 3 tables in my database that had values matching my term.
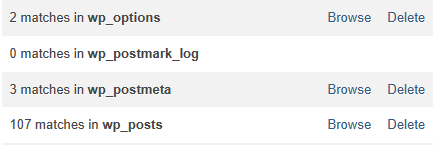
Keep this window open while we run the SQL queries. In this example I’m going to do the search and replace on the wp_postmeta table. Click the ‘Browse’ link on the table that you want to update (open it in a new window). This will show us the columns and data inside this table. We need to find out the name of the ‘column’ that contains the term we need to replace. It should be pretty obvious, however we will find out soon if you chose the wrong column, so don’t stress if you’re not sure. In this case I know that it’s the ‘meta_value’ column that contains the URL that I need to replace.

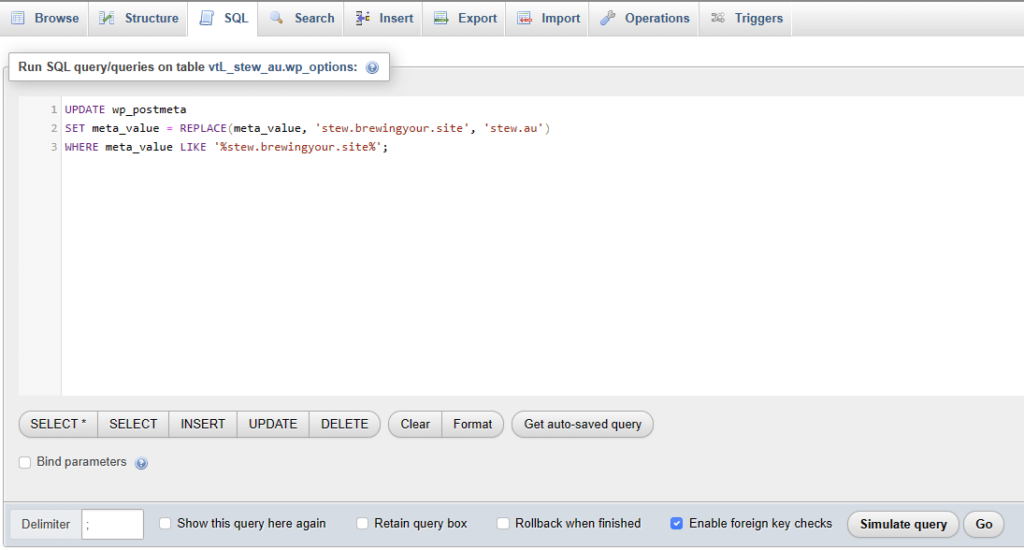
Now it’s time to run our SQL query. Here’s the template code that you will need to use:
UPDATE table_name
SET column_name = REPLACE(column_name, 'old_text', 'new_text')
WHERE column_name LIKE '%old_text%';
I have bolded the parts that you will need to replace, let’s walk through each one.
table_name – this is the name of the table, in our case we’re in the ‘wp_postmeta’ table.
column_name – this is the column inside the table, in our case it’s the ‘meta_value’ column.
old_text – the term we’d like to replace
new_text – what we would like to replace it with
Pretty straightforward. Click on the ‘SQL’ tab and type your query into the box. Here is how mine looked.
Before you run the query, click the ‘Simulate Query’ button. This will do a ‘dry run’ to check for any errors, and so you can check the output before you run it for real. This is also the step where you will find out if you selected the correct column, if the simulation returns that nothing needed updating, then you will need to try a different column.
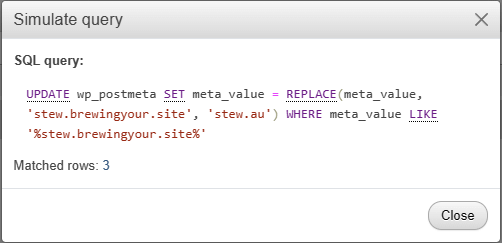
We can see that this query has matched 3 rows that need updating, which is how many matches there were for this table when we ran the search of the entire database, so we’re good to go. Now before you click the ‘Go’ button, make sure you have backed up your database!
Once you’re happy, click the ‘Go’ button to run the query. When it is complete you will see a notice telling you how many rows were affected, and confirming the query that was just run. If you get an error, look through the query and see if there are any typos or mistakes.

That’s it! Nice and simple, now just repeat that process for any other tables that need updating (go back to the initial ‘search’ window to find the remaining tables that need to be updated). Once you have finished updating the tables, do another search of the entire database to confirm you haven’t missed any that need updating.
I hope this helps, if you run in to any issues leave a comment and I’ll see if I can help.